As some of my readers know from previous corner articles, I have several projects that run off of my solar array and as such, I have been trying to find a low cost, under $100, and low power, in the 4 to 5 watt range, server to replace a regular laptop. Most of the units I have looked at that have the minmum required devices (USB host port, RJ45/Ethernet) cost above $150 for a single board. I have tried some simpler devices like the Hitachi SimpleNet (see CCII_11) and the Atmel NGW100 (see CCII_6,7,8), only to have one or more issues with the systems.
Part of my design concept is having some form of display that shows the solar array current and voltage input and output and thus any simple system that came with a display would be one step better than a single board solution. As you consider the development cycle, having a keyboard and a full system would make development even easier. So I started looking at netbooks as a possible solution, but found there $300 price tag a bit over budget.
In late October 2010, I noticed an add in a CVS Pharmacy flyer advertising a $99 netbook by Sylvania. The information was little more than a 7" screen and made by Sylvania. Later in the week, I did a search on the internet to see what information was out there - there was plenty. Some was good, most was not so good. As I checked out the responses, it seemed all the negative responses tried comparing the system against one costing $300 and up. If you want a full fleged multi-cpu system, I knew this was not it. The good reports however indicated that it did work, although it ran WinCE 6.0, which no one cared for. A few had put linux on it and were pleased.
I found one person in a chat room who pretty much explained it like it really was. Under WinCE it is a dog and not worth using. Under a regular linux install using a GUI, it is better than WinCE but barely. However, he found under a command line only setup the system worked very well and in fact was looking at web pages using a text only browser satisfactory. His only comment would discourage the average user, as he said it took a lot of work finding and selecting the right set of tools to do everything he wanted - something a new linux user would not be able to do. The system is simply not a plug and play setup under linux.
Since I consider myself well past the beginner stage and clearly know enough to get myself deeply into trouble far too often, this sounded like the ideal system for me. Since my ideal usage is as a remote web and data collecting server, the keyboard to screen response or even the need for a graphic web browers meant nothing to me. I work on remote linux systems all day long and thus have come to enjoy this ability greatly. This sounded like something I needed to get my hands on and play around with.
The first set of netbooks sold out after 2 hours in most of the CVS stores. So when the next flyer appeared with the add again, I decided to try and pick one up after work. I stopped in and walked around without finding anything. I decided to ask someone for help, and saw that the photo processor person was somewhat free. As I waited for her to finish with a customer, I noticed on the back counter behind her, a red - really pink - box, that clearly was what I was looking for. I didn't see any other units sitting around and thus indicated to her I wanted that one. In California we have a $8 recyling fee, plus our $8 sales tax, and thus I put $116 on the credit card and it was mine.
I have since read that the coming black friday(Thanksgiving 2010), well actually all week, they will be on sale at $95 using your CVS savings card. I have also looked at several sites representing China manufacturing outlets and have found numerous variations on this for $60 to $80 each. Buying at CVS is no bargain in reality, but I was able to get one without waiting. I ordered an I-Pad knock-off after looking at several of the sites offering the cheaper units and will be reporting on it later.
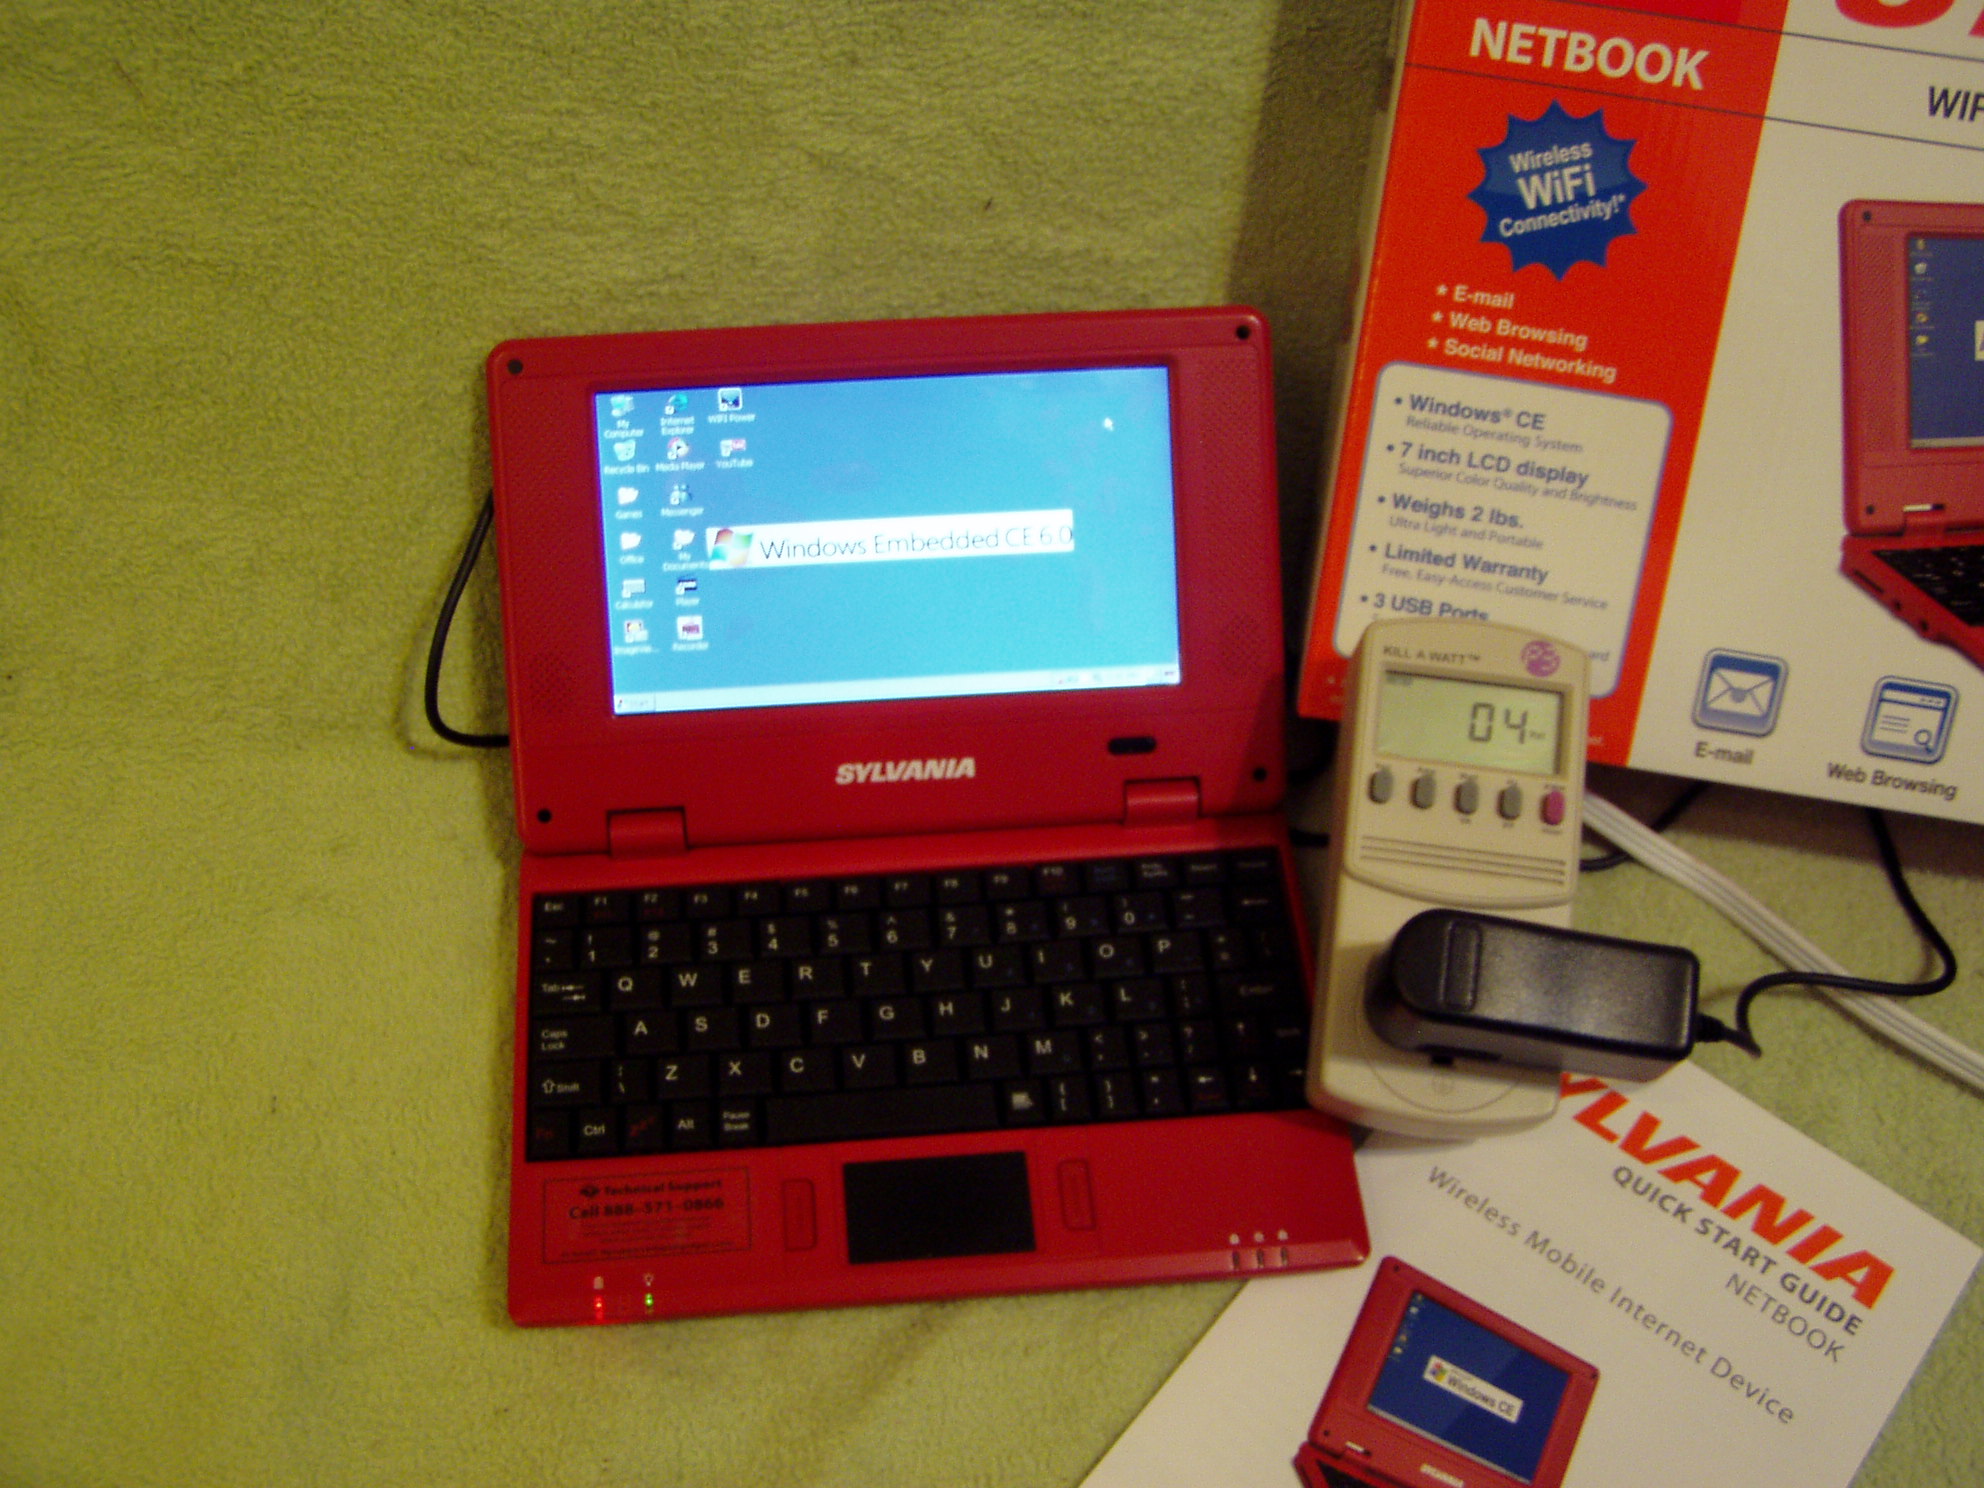
Picture of what you get - shown using 4 Watts!
The box is not very large - about 3 inches deep, 12 inches high, and maybe 14 inches long. There is plenty of packing to protect it, and thus you actually get a small, 5 inch by 8 inch netbook and mine is bright red. I had read that some had issues over charging and recommended charging it for a full 24hrs before use. I didn't and it worked just fine from the supplied transformer. When opened mine had a peel-off tag on the corner, saying that tech support was at "digitalgadgets.com" and I have since been there. There is not much on the site right now - other than a patch for the wifi under WinCE. So I suspect if your having problems with the wifi, you might want to get the patch. However I would suspect as well that going right off to linux would be better.
I was surprised when I used it as the forums had indicated it was clearly a dog machine. In fact it worked rather well and was not a screamer system, but when connected network wise using the ethernet RJ45, it brought up my web pages qucikly and cleanly. I have since taken it to work and let others play with it and all were impressed. Everyone agreed it was not great, but did semm to work better than they expected, and thus all were impressed. I did find the WinCE controls for setting networking and have yet to try the wifi, since I have little interest in that.
There is a flyer in the box that gives you some help in setting things up. The web site has the flyer and a little bit more information, althought none of the help documents provide anything really helpful. They expect you to know how WinCE works based on your knowledge of windows and thus they keep it pretty simple. If you were a first time computer user, which I suspect many of the complainers were, the support information would only make you more un-happy, as it is clearly lacking.
The flyer does provide a few facts, the processor is a VIA8505 (actually WindowMedia - WM8505, a division of VIA), has 128MB of RAM, 7inch high resolution TFT screen running at 800x480 ( which for 7inch screens is considered HIGH resolution), SD card slot (supposedly will handle 32GB cards), wifi 802.11 b/g, the normal audio in/out, 3 USB ports (one marked keyboard, one marked mouse, and one supposedly USB2.0). The battery is 8.4 volts at 1800MAh lithium. The flyer says 2 lbs., but I think it is less. What is missing is the fact that it also has 2GB of flash, but I suspect it is missing in the specs since it is carved up by WInCE and you clearly don't get 2GB to play with.
I wanted to know more about the system, and found the web sites to be less than helpful. I did find one that took an I-Pad knock-off apart that basically is the same as this, but with a touch screen. It had some information but wasn't specific to mine. So I took mine apart. It came apart easily, althought I had a few mistakes that I will explain shortly. I took pictures and using my Wife's favorite tool to get detailed picture of small objects, scanned it. The pitures of the board are attached to this article.
I was surprised to find that WonderMedia appearantly makes a system daughter board that they sell to other vendors to put on their own boards. The main board has this "daughter" and one other - I think the wifi, with some support componets spread out over the main board. I can read - as you can too in the pictures - most of the componets, except for a few regulator chips. I found what I was looking for, and that was the serial solder pins for putting a console port on the system. I learned on the Simplenet project the importance of having the console interface if you want to change or work with these Arm systems. I put some pins in these holes and put it back together. It even worked again.
The process to open up the system goes something like this. Start by removing the two screws that hold the battery cover on the back of the unit - might take a little prying to pop it open. Remove the battery and disconnect at the plug. Take out the two screws that hold the keyboard in place, one is above the label, and the other is below the label. Now instead of un-screwing the back side, flip it over and look at the top row of keys as they touch the top plastic. You should see four little tabs holding down the key pad. Lift gently with a small screw driver on the sheet of keys, while pushing in the tabs. This will release the keypad from the top and then you can pull it forward and free the tabs at the bottom of the keypad. At this point you want to release the keypad cable from its socket - the dark colored part of the socket is the compression tab to locks it in place.
You might at this point want to release the two other cables, the lower left is the touch pad, the lower right is cable to the two push buttons on either side of the touch pad and the LEDs at the front of the unit. This is all part of an accessory board that runs accross the front of the unit. Now flip it over and remove the remaining screws and stick a small screw driver in the front middle where a single bit of plastic holds it together. I had some problem getting my top to pull away from the two hinges and it seemed using the small screw driver to pry up ever so slightly on the top of the tabs, freed them and allowed them to slide over the hinges. It is a bit tight where the hinges and the top of keybard come together and thus will take a little playing with to get it to separate cleanly. After a few trys I was able to fold the lid back just right and give a pry and the top came free - a bit of having the right push-pull experience to make it work easily.
At this point you have a single screw that holds the main board down, and thus all the componets are on the underside. So if you need to do something to the main side of the board you have to remove the screw and can pull the board then. However to truly free the board, you will have to un-solder the four wires that go to the lid on the right side. The left side has a cable that you can free by poping the clamp - just like the other cables. Before un-soldering the wires - write down the pins and colors so you don't forget where they go. You now should have a free board to work with.
First off - do you need serial - absolutely not! Do you need to take it apart? As it turned out, everything I like doing with the serial can be done using a SD card, and thus taking it apart is really only for those of us too curious to let it go un-opened!. I do like using the serial interface however, as it gives me more information about the setup and hardware and may open up other options. In doing the Atmel NGW, the uboot had the option of loading the kernel not from flash, but from an TFTP site. I setup my workstation for TFTP and would do a build that placed the new kernel and OS code in the exported TFTP files system. A reboot would reload the OS fom the site and thus simple changes could be tested in seconds instead of the many minutes it took to re-flash a SD device. It made testing simple changes fast and easy.
NOTE: It has been some time since I wrote the above comments, and I have found how to do a TFTP boot, using the SD device instead of the serial option. I have also followed the below comments and have the unit up and running, without need for serial access. I must say this has been way too easy to do and setup. In fact you can go see what I am doing on it, by going to the actual unit on line. The SYNET07526-R on-line - see web pages from the netbook. At this point, I will cover what I did to put linux on it and leave the web setup information for another article(ccii_14). I want this article to focus on the hardware, what you get, and how to put the initial linux on it. The setting it up as a web server and data collector is a separate topic, since it isn't specific to any one hardware platform, but generic to using debian in one application.
At present, sites are rushing to get code and tools for WM8505 systems. The major site if your planning on doing Android is google. If you just want a version of linux, checkout bento-linux.org( no longer active). They have images and source code of the linux kernel for the WM8505. Their instructions are pretty good and users with some experience should have no problem doing an install. I used lots of similar steps in my Atmel work and thus found them easy to follow. Now if you barely know what an SD card is, you will most likely not be able to follow the instructions. The instruction do not cover all the steps, but just layout the problems you will encounter and what needs to be done. The first problem for many will be the fact that everyone assumes your running linux - if not on linux - try ubuntu and learn it before trying to convert your WM8505 system. The second issue is - all command line instructions - learn to use the command line before attempting to use or install linux. You have been warned!
For the full set of instructions that were on bento - which is dead now - you need to read more of my arm based articles - as they are all the same process, just different images. See below for copies of the old images copied from bento and used for this article. For testing - you may want to do a "live" install - does bootup and runs from the SD completely and does not over write the flash. The "README" section of the Bento article covers how to do a live install and you can follow those steps. The main difference is which script is used and whether the file system is left tarred up or expanded. The basic steps from the link to install debian are these ( NOTE: this will over write current OS - WinCE6.0):
1. Create a single, large FAT32 partition.
2. Extract the 'fatpart.tgz' archive to the root of the SD card

tar -xzvf fatpart.tgz -C /media/disk/

3. in the 'script' folder that was extracted into the root of the SD card, rename 'scriptcmd.install' to 'scriptcmd'

mv scriptcmd scriptcmd.live
mv scriptcmd.install scriptcmd

4. copy 'extpart.tgz' into the root of the SD card

cp extpart.tgz /media/disk/

When you are done, there should be 1 folder (script) and 1 file (extpart.tgz) in the root of the SD card.

Insert the card into the netbook and start the device.
It should give you a chance to turn off your device before it erases the NAND and installs debian.
NOTE: SD card goes in with gold fingers up and should be almost flush with case when fully installed.

It will ask you to remove the card, at which point it will reboot into your new Debian install!
It will ask you to login, use the user 'root' with no password.
You should configure a password for "root" using the 'passwd' command.
This is a bare bones debian install, for a GUI follow the X11 instructions at Bento link.
NOTE: if you don't want to over write the flash but just want to see if it works - follow the instructions in the README section of the page. Basically you untar the extpart into the flash ext2 partiton after untarring the fat section and go boot from the card.
Here is my steps - synet is where I downloaded the two files from bento-linux. It should not be necessary to partiton the SD card - if your installing Debian - as most cards are already FAT16. However, I did mine to be able to play with both install and live versions. Use fdisk to partiton the device with at least a 64MB FAT16 partition and the rest as EXT2. Many of the operations will require being "root" and thus I used sudo instead of logging in as "root".
> sudo fdisk /dev/sdc
> sudo mkdir /mnt/sdc1 /mnt/sdc2
> sudo /sbin/mkfs.msdos /dev/sdc1
> sudo /sbin/mkfs.ext2 /dev/sdc2
> sudo mount /dev/sdc1 /mnt/sdc1
> sudo mount /dev/sdc2 /mnt/sdc2
> df
Filesystem           1K-blocks      Used Available Use% Mounted on
/dev/sdc1                65402         0     65402   0% /mnt/sdc1
/dev/sdc2               896008       904    849588   1% /mnt/sdc2
> cd ~/synet
> sudo tar -xzvf fatpart.tgz -C /mnt/sdc1
script/
script/installrd.gz
script/cmd
script/make_scriptcmds
script/scriptcmd.orig
script/cmd.install
script/scriptcmd.install
script/uzImage.bin
script/logo.bmp
script/scriptcmd
script/mkimage
> sudo cp /mnt/sdc1/script/scriptcmd.install /mnt/sdc1/script/scriptcmd
> sudo cp extpart.tgz /mnt/sdc1
> df
/dev/sdc1                65402     53234     12168  82% /mnt/sdc1
/dev/sdc2               896008       904    849588   1% /mnt/sdc2
> sudo umount /dev/sdc1
> sudo umount /dev/sdc2
>
NOTE: When doing the overwrite/install - the ext partiton is not used at all. This will overwrite the flash and setup the new file system. Mine worked with a few error messages about bad sectors - have no idea what that was about - but it worked and came up. The network says it worked but I couldn't connect to anything - due I think to my DCHP server being down. This is a minimal command line based install and you will need to setup the network, do apt-get to get more utilties, or apt-get to get X11 for a gui.
There are a few follow up steps after installing the base system. The first item that you really need to do is set the "root" password. Without setting it, anyone can login and play with your system. If you plan to never connect it to a network, no harm without a password, however most systems are compromised when connected to the internet within minutes if left un-secure. You will want this done for other reasons that are covered in a later article.
Generally you do not want to be using the root user all the time and thus will want to add another user. I did the "adduser" as given in the bento-linux instructions, only to have logging in as the new user fail. I saw notes about "chmod"ing the root, but no explaination of why. It turns out that for some reason the root or "/" directory permission is not correct and you need to do a chmod on it. I did "chmod 775 /" and that fixed the login problem.
Since this is a base system, you will need to update the installed OS, which will require network accesss. Test your install by doing a "ping kiblerelectronics.com" and if you get network not found, your network is not working. Instead of coving the steps to fix this, I suggest you go to the Debian Adminstration web site, as their explanation is very good and you may want to use that site for more than just the networking issues. Go to: debian-administration article 254 and follow all the steps shown.
The next issue is the time - mine was way off and when I did apt-get I saw tons of error messages about how the time stamp was in the future. You can use the date command to update the time and will need to change the time zone as well (use the above link and get article 213 for time zone changes). I found the fastest way was simply to do an "apt-get install ntp" now that you have networking running. After ntp was installed, the time was updated and further updaing using "apt-get' went without error messages.
At this point you have Debian installed, can run apt-get to install more apps, and depending on your reasons for doing the install, are ready for the next step. Since my use is specific and needs numerous additons, I have explained all those steps in Computer Corner II number 14. If your needs are more user oriented help, just browse the internet, as there are plenty of sites explaing how to use linux and Debian in detail.
You might want to come back and check this page from time to time, as I will update it if I find mistakes or get more information on some specific topic. In short, enjoy your new system and have fun.
Hello, and happy new year.

I was given one of those Sylvania netbooks with WinCE on it for Christmas.
So today I went hunting for whatever I could find out, in preparation for
going to the LUG meeting tomorrow evening and impressing everyone.

Your instructions about what to do are pretty good, but there is a trick
for making the thing see the SD card at boot. Namely:

You have to cycle the power off and on again immediately after starting it
up. You see the first splash screen where it says it is loading the OS,
and you have to hit the power button immediately and hold it for a second
or two, then let go. When you are successful you see a horizontal bar at
the bottom of the display. The netbook then starts to boot off the SD card
and not off the internal flash.

Before I learned to do this trick, I thought that things are just not
going to work. When I do not do this, it does not see the SD card and it
just goes ahead and it boots WinCE.

Since you have an otherwise very informative and nice README, I just
thought you might want to add this and also let the people at Bento know
about it, because they do not seem to know, either.

Theodore Kilgore
My comments:
Hummm - very interesting.

I think the reason you haven't seen this, is that it is not the normal
response. I didn't have to do it on my machine and I suspect that
most users don't either. But I will post it as a "if problems - try this"
since it could be anything from a early version of the boot rom, to
a minor hardware/timing issue - and I have certainly seen a few
quirky operations that suggest some hardware issues.

Let me point out one other issue that might be one of your problems.
The Uboot loader for SD devices only supports the 2gb and less devices.
The 4GB and above ( there are no 3GB devices ) are formated in a way that
Uboot can not handle. Thus if you try using larger than 2GB SD devices
you most likely will fail in some way. I had limited success using
smaller partitions of larger devices, but it seems for best results just
stay with the smaller devices. After linux is booted, if you can replace
the SD device, the linux system will handle the larger devices - it is
just the boot process that can't.

So thanks for the tip and checking my site out.
Bill.