It is mid 2011 and I have many months of using the netbook and tablet that are covered in previous articles. For the most part, all has been working pretty much as expected. However a few weeks ago I noticed the netbook had locked up and so I rebooted and all was well again. Not long after that I noticed the same problem and instead of remotely rebooting, I did it from the console if you will. On reboot, I saw all sorts of file errors, and when I logged in and looked at things, it was clear the file system was corrupted - badly! Now this is pretty unusual for linux to corrupt a file system, but then it was a different architecture and I knew the kernel was not produced in any sort of ideal condition.
This has started a whole chain of events and revisits to numberous topics and tests that I will try and cover in this article. My first thought was, I just needed to updated the kernel and that would clear things up. In searching the web, I found Bento gone and basically couldn't find any new work on the WM8505 at all. Since this was the netbook, I checked Digital Gadgets ( the support for the Sylvania netbook) and discovered a new Windows CE "shell" version. I tried it and was surprised that it was a complete update of the OS. It was also interesting to see the old windows style screen popup and then be overwritten by a "android" like display. I didn't play with it too much, but if your not using linux and just want a better working netbook, I would suggest you do the update and give it a workout.
For those following the computer news, you would be aware that Microsoft has been taking a back seat to all the IOS and Android goings on. So it isn't really a surprise that the big guy is changing their look and feel to be more like the wining groups. Add in the fact that Nokia is going windows, and it is pretty clear that WinCE will soon be looking and working like android. For us netbook users with the 7" screens however, the upgrade is good news, but a bit late. The problem is not the software, but the fact that our systems are already too old to be of interest anymore. The market has pretty much moved on to 9 and 10 inch screens, 10 to 12 hour battery life, and requirements of better graphic engines and larger pixel sizes. Supposedly the newer android OS versions all require a graphic engine with certain features or it will not run on the device.
Keeping all that in mind, I wasn't really surprised to find support for the netbook practically gone. I was a bit surprised to find the "bento" page gone, but not to find the kernel source untouched for a long time now. So it basically means we are left on our own at this point for support. There are a few updates in the android area, but most are moving to support the newer devices, and being honest, there really are some major issues with these older units. We don't have a true kernel source tree to update and the chip set is less than desireable. The units are still very usable, just don't expect any help at fixing problems or adding cutting edge tools.
The netbook was setup using a laptop hard drive with 40gb of space. I did that for development reasons, as I had the whole kernel source code and a few other programs on it. It still wasn't a lot, about 10 GB of data, but it let me play and see if the arm was upto snuff. I tried to backup my data on the drive only to find it was so corrupted that most of the data was gone. Whole directory trees were now empty and some of my data collecting files were missing major chunks of data. I started playing with the system, using other USB drives, both real and flash, only to find similar problems. It made me think the problem was the USB driver. So I went back and used a SD device setup and that seems to be working.
As part of my testing I went and checked my tablet setup, only to discover that it too had a corrupted real hard drive. The results were the same, USB drives got corrupted easily, while using the SD device seemed to be ok. However the tablet started to show signs of another issue - battery failure. It would boot and then turn off. The LED for charging would be red and never go green. I checked a few forums and only found two entries of other users experiencing the same problem - no replies to their questions. This has prompted me to take my unit apart, following some guidance from a video. It is simple to get into the tablet and you don't find much there. The battery is small and comes with a circuit board in the battery pack.
Before I get into the details of the tablet issue, let me say that my overall feeling about using these units has changed over time. I like the units cost, but find the feature set a bit too limiting. These units have clearly broken ground for a new series of products, but it looks like they will be pushed off the hot product list into the has been status real soon. I remember the early EeePC had a similar fate. While doing the problem solving, Fry's electronics had EeePCs on sale for $188 and so I bought one to replace an aging web server. I had problems with the arm netbook working with my Phidgits data collector, and was please to see all the software worked as expected on the atom chip set. The overall power consumption has been 8 to 10 watts and although twice my netbook, well within reason. I think I was especially happy to see debian run from a network install, and thus not needing any special software tweaks or changes.
I like the arm chips for low power and compact designs, but have considerably concerns about them not being main stream just yet. I think within the next year or so, you should be able to get arm powered devices that will be pretty stable and easy to upgrade without any special skills. For now however, there is a select few who can work on the arm devices and thus using a x86 chip is probably a better bet for most. I know I have been plesantly surprised at how quick and easy it was to setup the EeePC for what I needed. True it cost twice if not normally three times as much, but it worked if you will "out of the box". I think it will be some time before I can say that about the newer arm systems.
So here is my current status - the netbook is working fine running linux on a 2GB SD device. I have found some newer android kernels that seem to work slighlty better. I have stopped using flash drives for holding the file system, as they seem to become corrupted very easily. There seems to be little new work on these devices as everyone moves to the newer chips and screen sized units with better battery life. It looks like I can keep using the system, as long as I restrict their use and don't rely on the battery or new software. That still stays within my orginal usage concept of remote embedded devices collecting data from some serial text stream and transferring it to a home site.
I need to test using NFS for both the file system and data storage, so I have a few more tests I want to run on these systems. That means I need to keep using and fixing any minor issues that I encounter. My netbook is currently testing the SD vs USB issue, so time to work with the tablet. That means I need to overcome or work around the battery issue or fix it. So I took the unit apart and started some tests. Can you use an external battery source or power supply? Will it run with the battery removed? Time to see.
What got me opening up the device, was a newer version of android that said it had improved battery management software. Well it was different, but I can't say better, as it never got much past a boot up of android before it shut down. I did get one quick display with a report of 50% battery charge before it died. So what is going on - time to open up. I watched a video, but my network is so slow, the stop and start action just guided me on my own exploration. Actually opening is rather simple once you get a few good pointers. The mylar surface is stuck on and you need to peel it back and off the unit to get access to the four screws in each corner. The button end seemed to allow acces under the material a little easier than the other. Be slow and easy going and the mylar will come off in one piece.
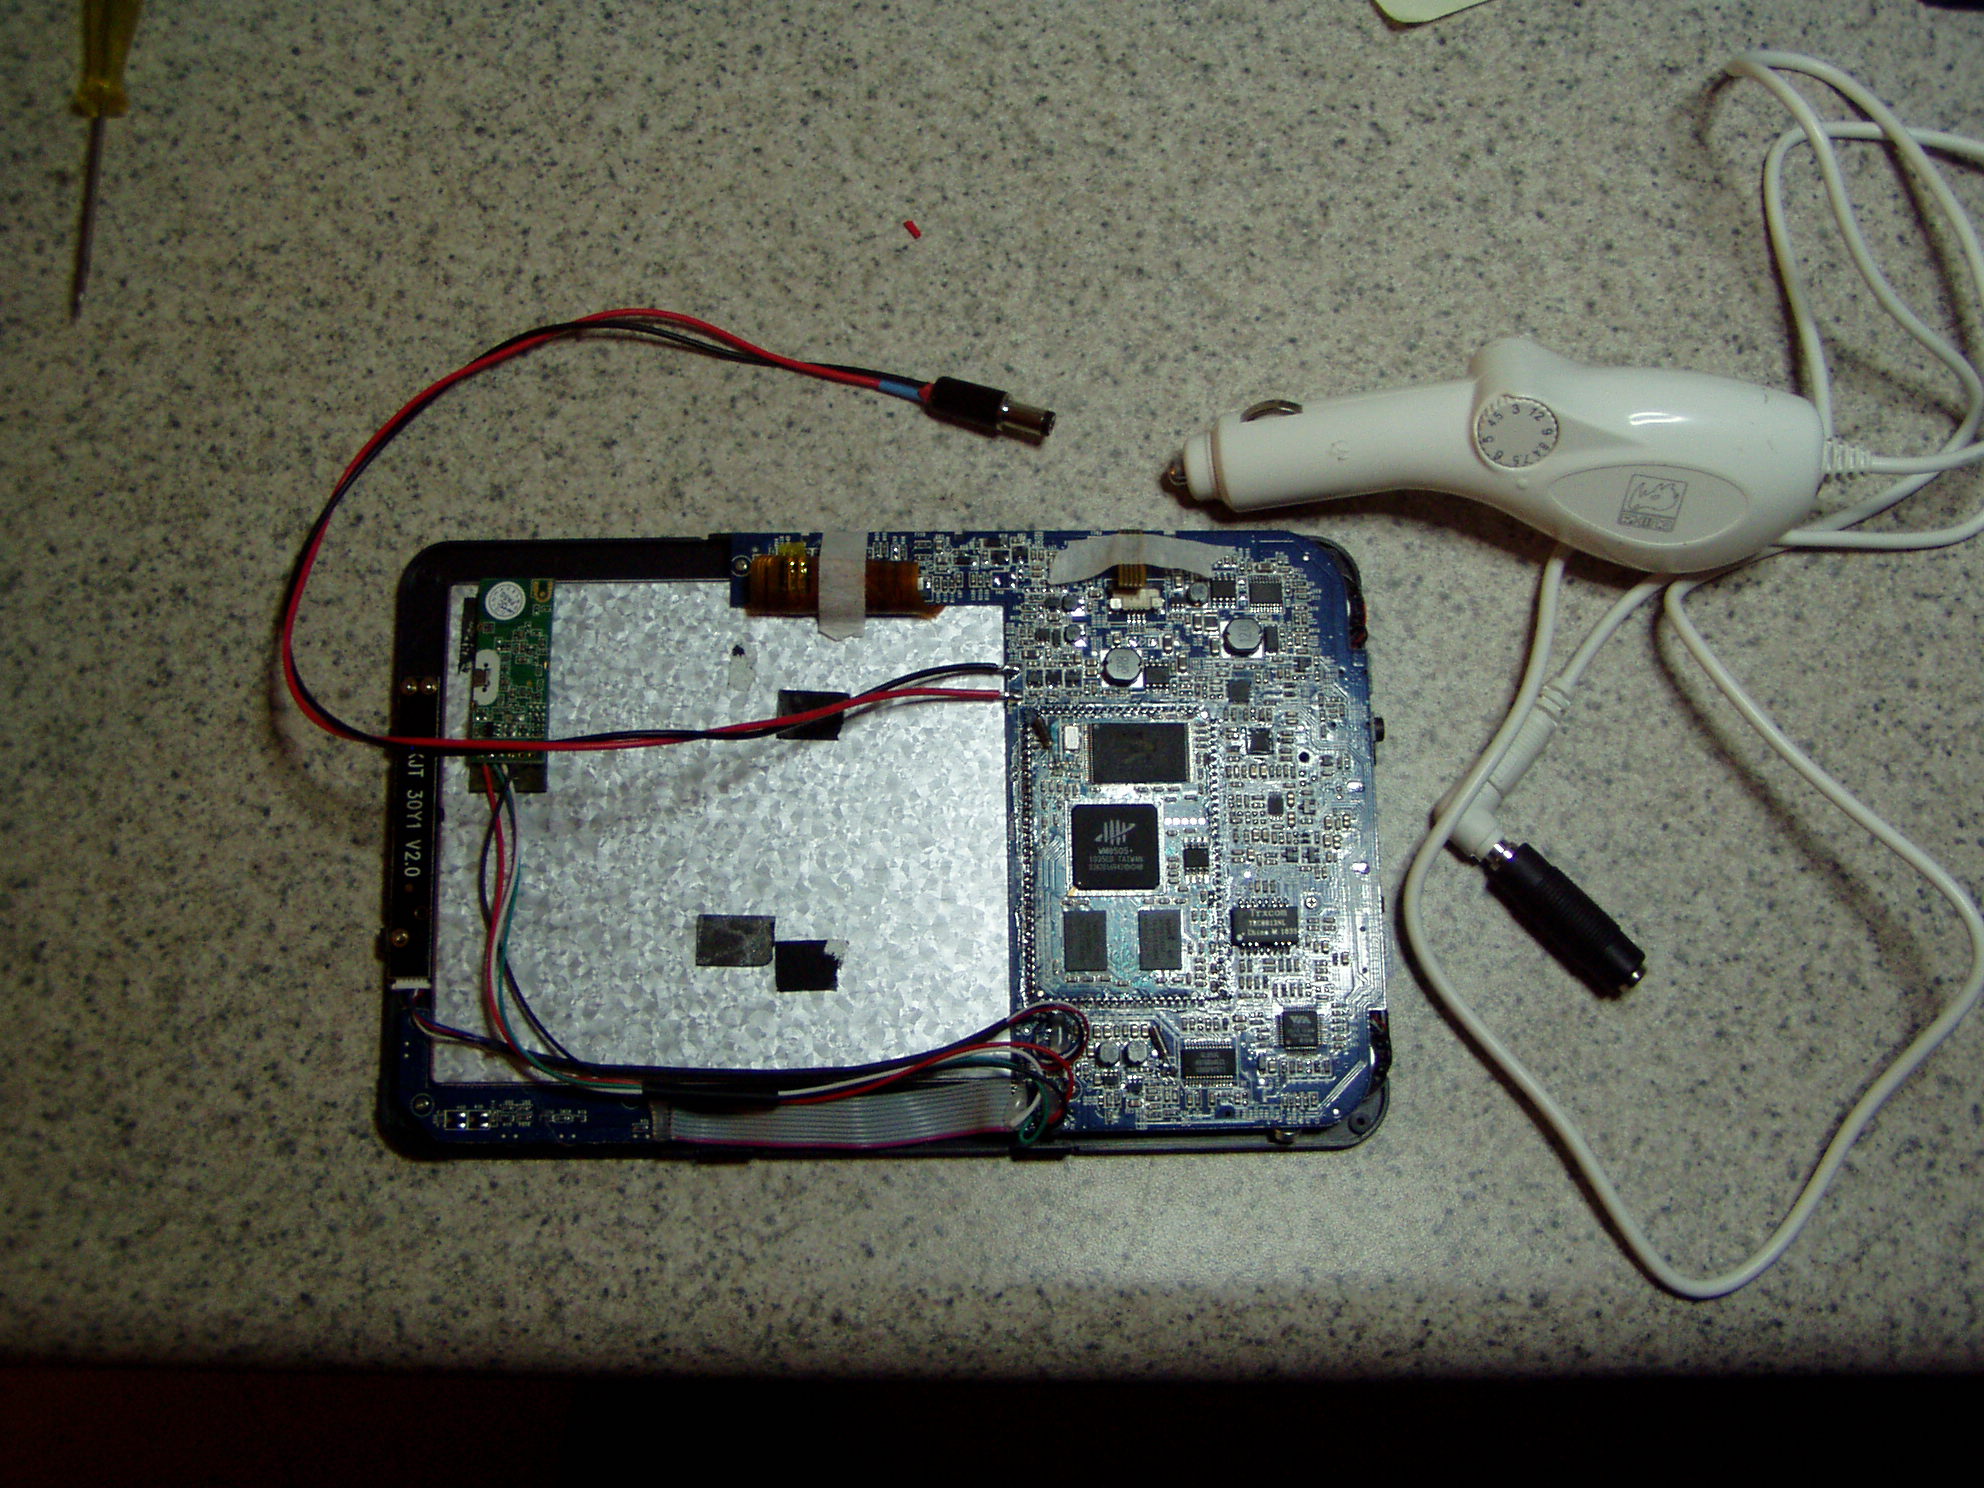
At this point you see the touch screen and a few sensors, but mainly we are interested in the four very small screws in the corners. Remove those and take a small blade and bow out the edge of the case to allow the body to become free of the clips holding them together. Take your time and start at the end away from the power-on push button. The back will need to be slid off the power button end and not pulled straigh back. Once done, you will see why it needs to be done this way, but for now just be-aware that it can hang up on the one end and thus go slow and maybe take several passes freeing the back before trying to remove it completely. Once off you can turn it over and see all the parts and battery, as well as tons of tape. Almost everything is held together by double sided tape and held down with a strip of tape to keep it out of the way while being assembled.
I removed some tape strips and had to pry the battery up from the back of the screen. Use a knife and slide it under the battery giving a little up lift as you try and break the tapes hold. I found 4 half inch squares of tape holding my battery in place. The battery is two LiIon Po 3.7V batteries in series for a total output of 7.4V. I searched for replacements and could not find any, but I did see some specs which indicated the circuit board that is wrapped inside tape holding the batteries togther is for limitng the charging and discharging operation. This is all to make sure the limits are not exceeded and distroy the battery (i.e. catch fire). You will find a red and black wire soldered to the main board that can be easily unsoldered for complete removal of the battery.
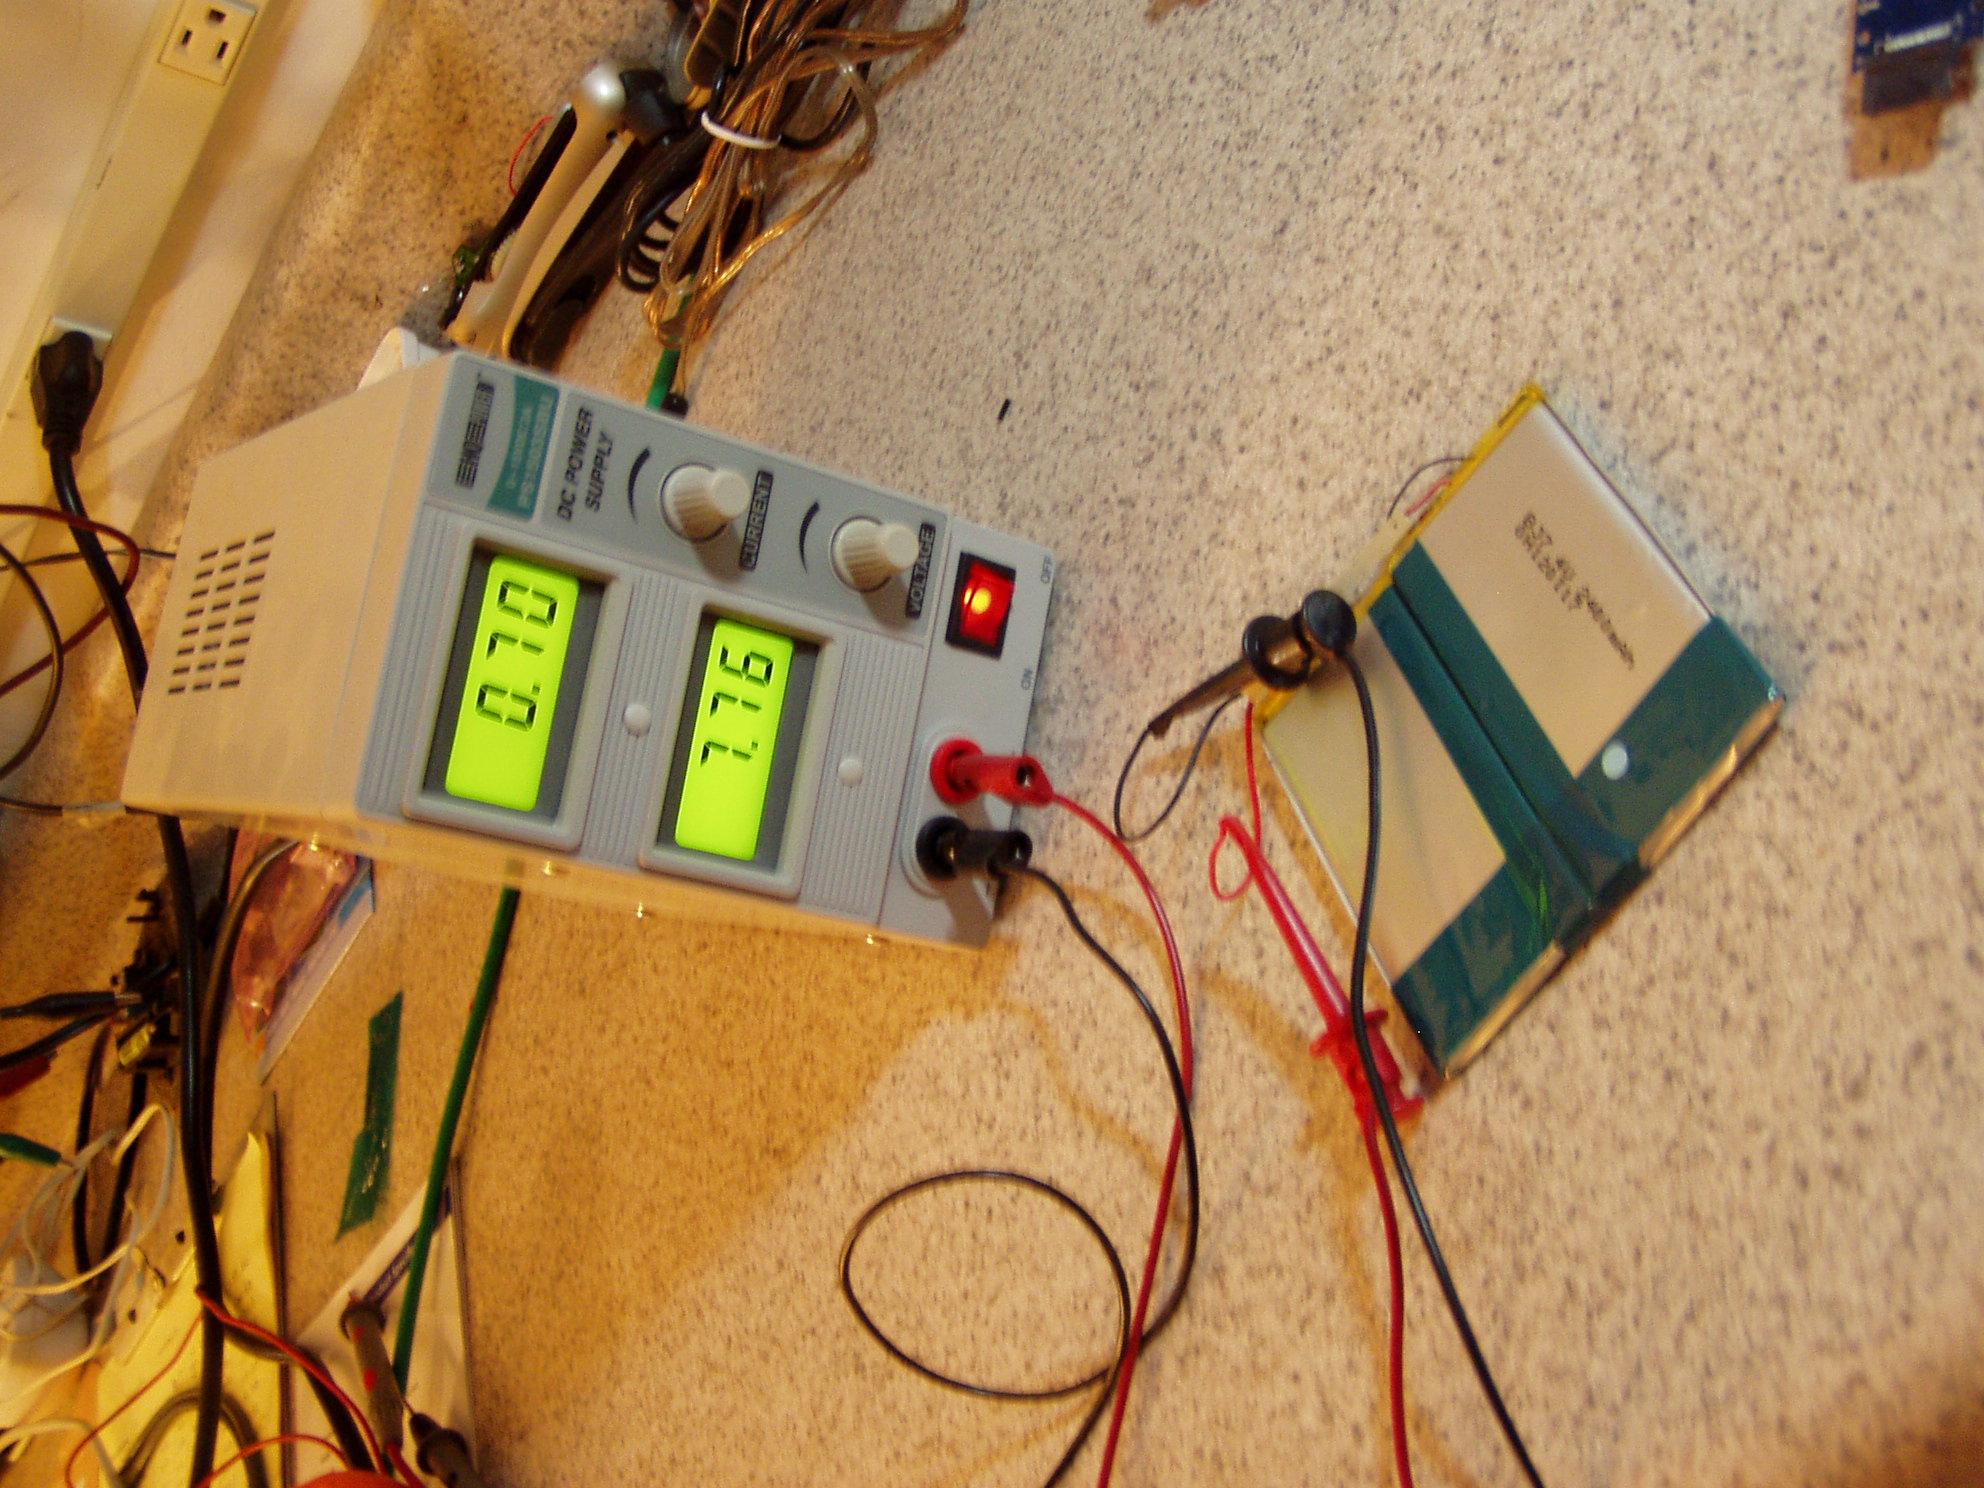
I removed my battery and tested it, only to find it good. This suggests that the problem is the charging circuit. Since I found the battery discharged, and tested the battery solder points on the board, and found no voltage there - we can assume the charging circuit is bad. I know my system gets hot, so I will assume it got too hot and burned out. Now I noticed two other forum messages that both said they had theirs on charge all the time. I now consider doing that a bad thing to do. Having it on charge while using it and unplugging it when fully charged is probably all you want to do.
When I put mine on the power supply - checkout pictures at bottom of page - I noticed that when off it draws about 20 to 30 MA. Not much draw when off, but more than enough to fully discharge the battery over a week or two. What I decided to do was remove the battery and solder wires to an external connector so I can run the unit on an external battery or power supply. I have a test power supply that I can adjust the voltage and hooked one up as shown in the pictures. It seems to work very well at 7.5 to 8.0 Volts. The battery was 7.4v, but could be charged up to 8.4 or so. When running android, the battery report said 72% when at 8.0V, while 7.4V was only 20%. Clearly there is some issues to be taken with the android idea of a fully charged battery.
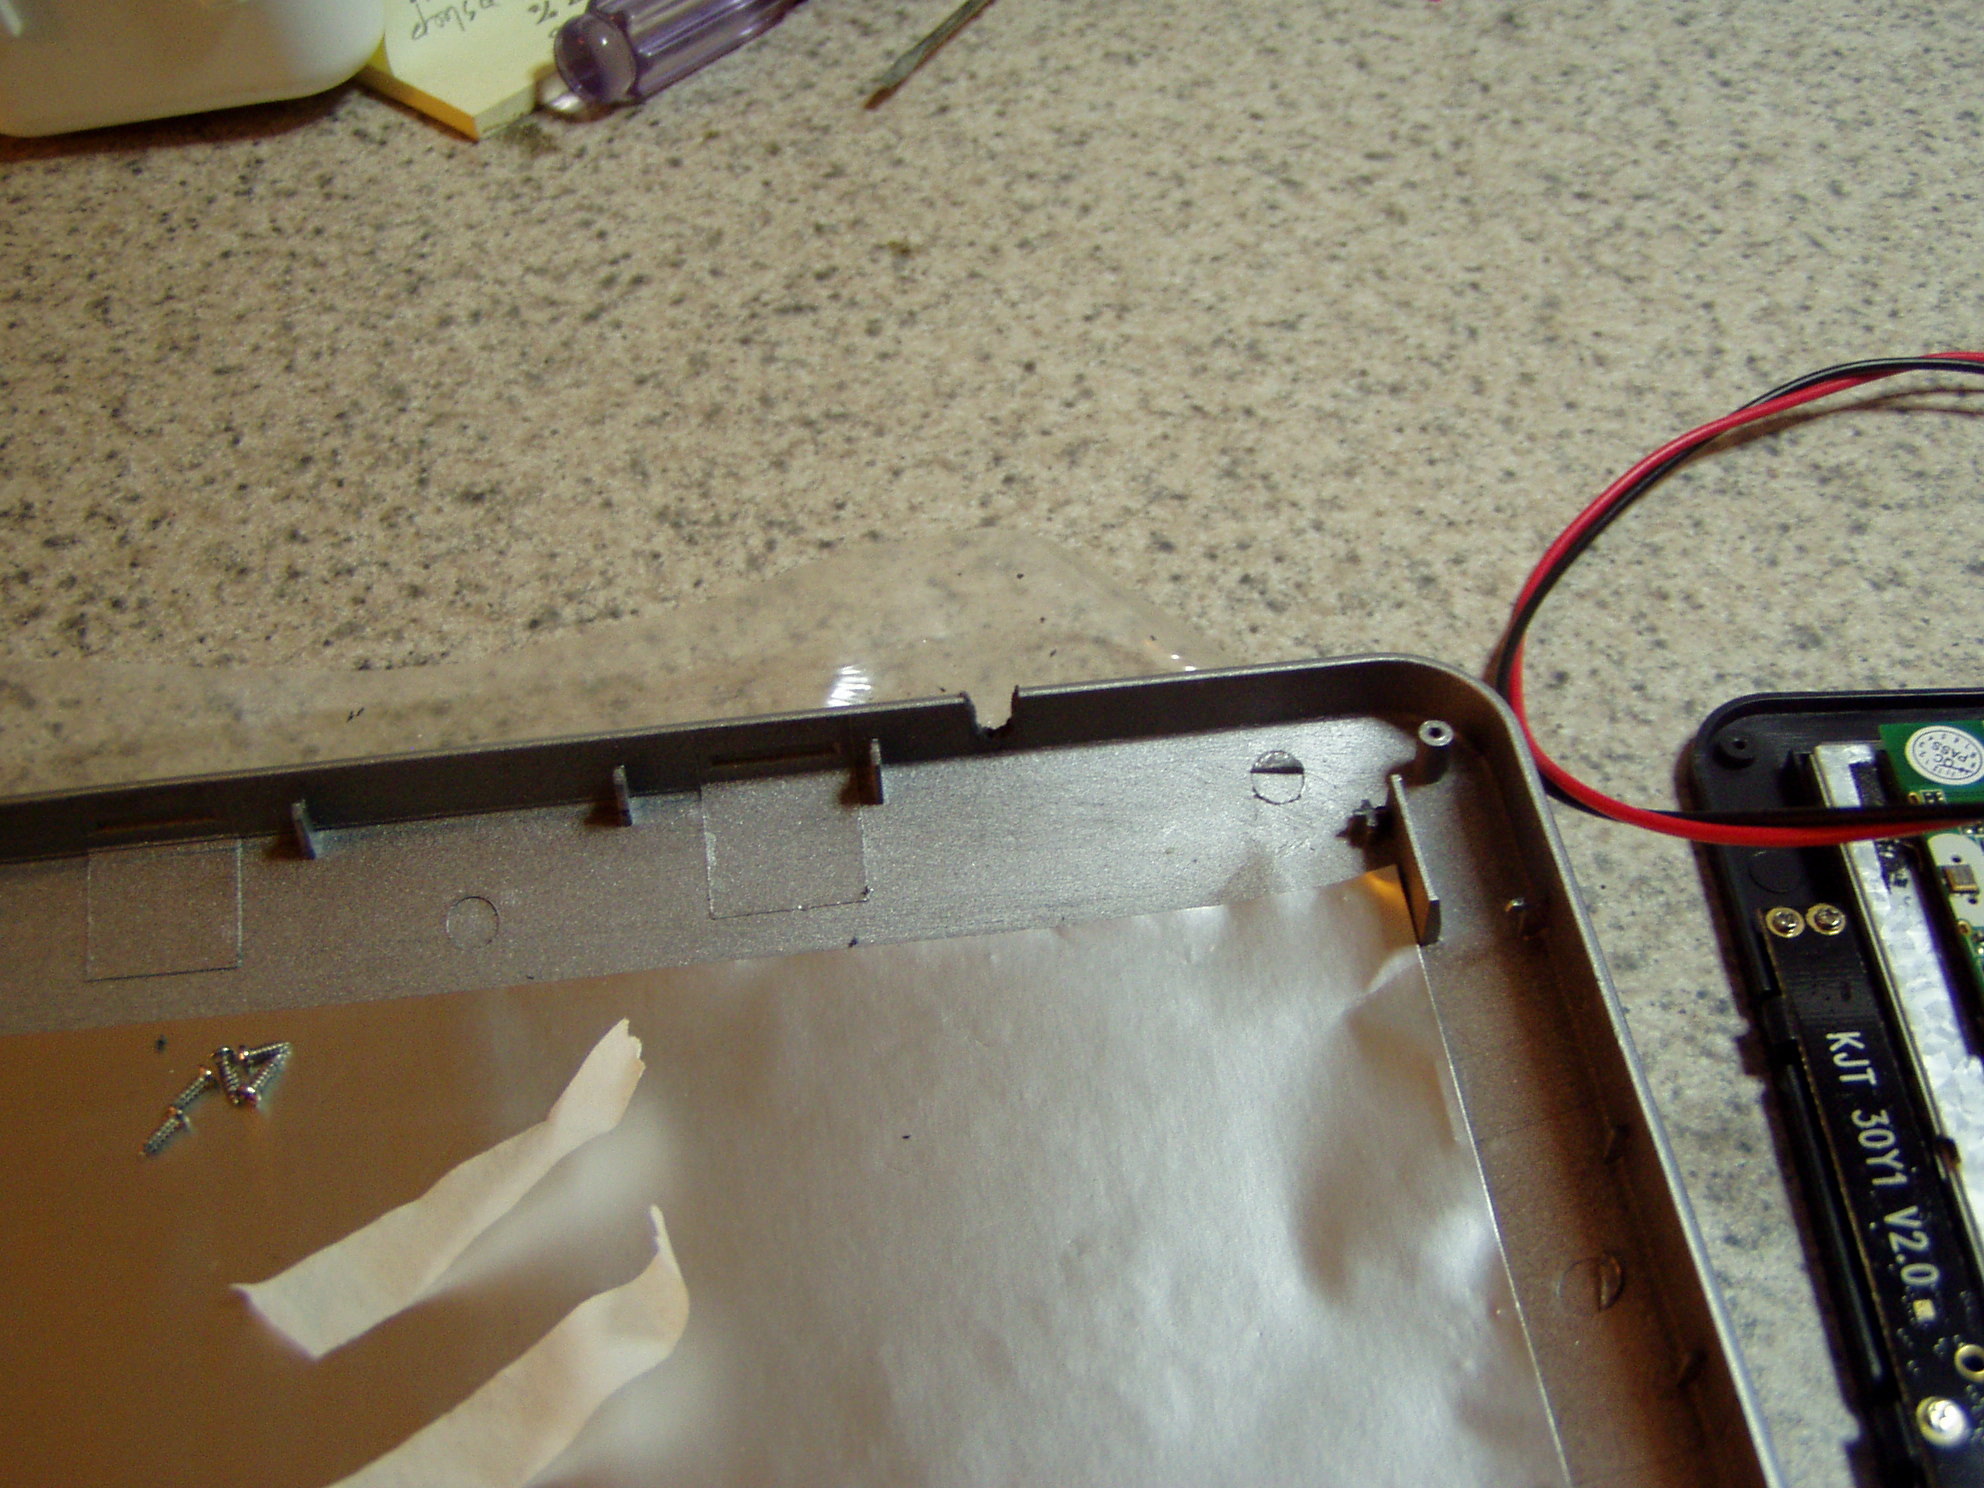
The pictures show the notch I made in the case for the wires and I have re-assembled the unit and all works as normal. I now have the option of using a very large external battery, or while in a car the adapter shown in the picture. When I tested the unit out of the case, I did notice the chips getting a bit warm. This makes me concerned that the units could get overheated if left on 24/7. Since my plans was to do 24/7 stuff with them, I now think out of the case is probably a good option. There are only two ribbons assoiated with the touch screen and thus it seems somewhat easy to separate the screen from the board, which is closer to what I wanted to do with this unit.
My orginal idea for this unit, as compared to the netbook, is using the touch screen to change displays and enter minor options while acting as the control panel for a solar system. I had concerns that the in and out made it hard to mount, but now I know I can easily separate the parts and get what I was after. So I am not really sure how long the case will be on before I test separating the screen from everything else. That will be a separate article for sure. For now however the power problem is fixed, all that is left is upgrading the linux side and fixing file system problems.
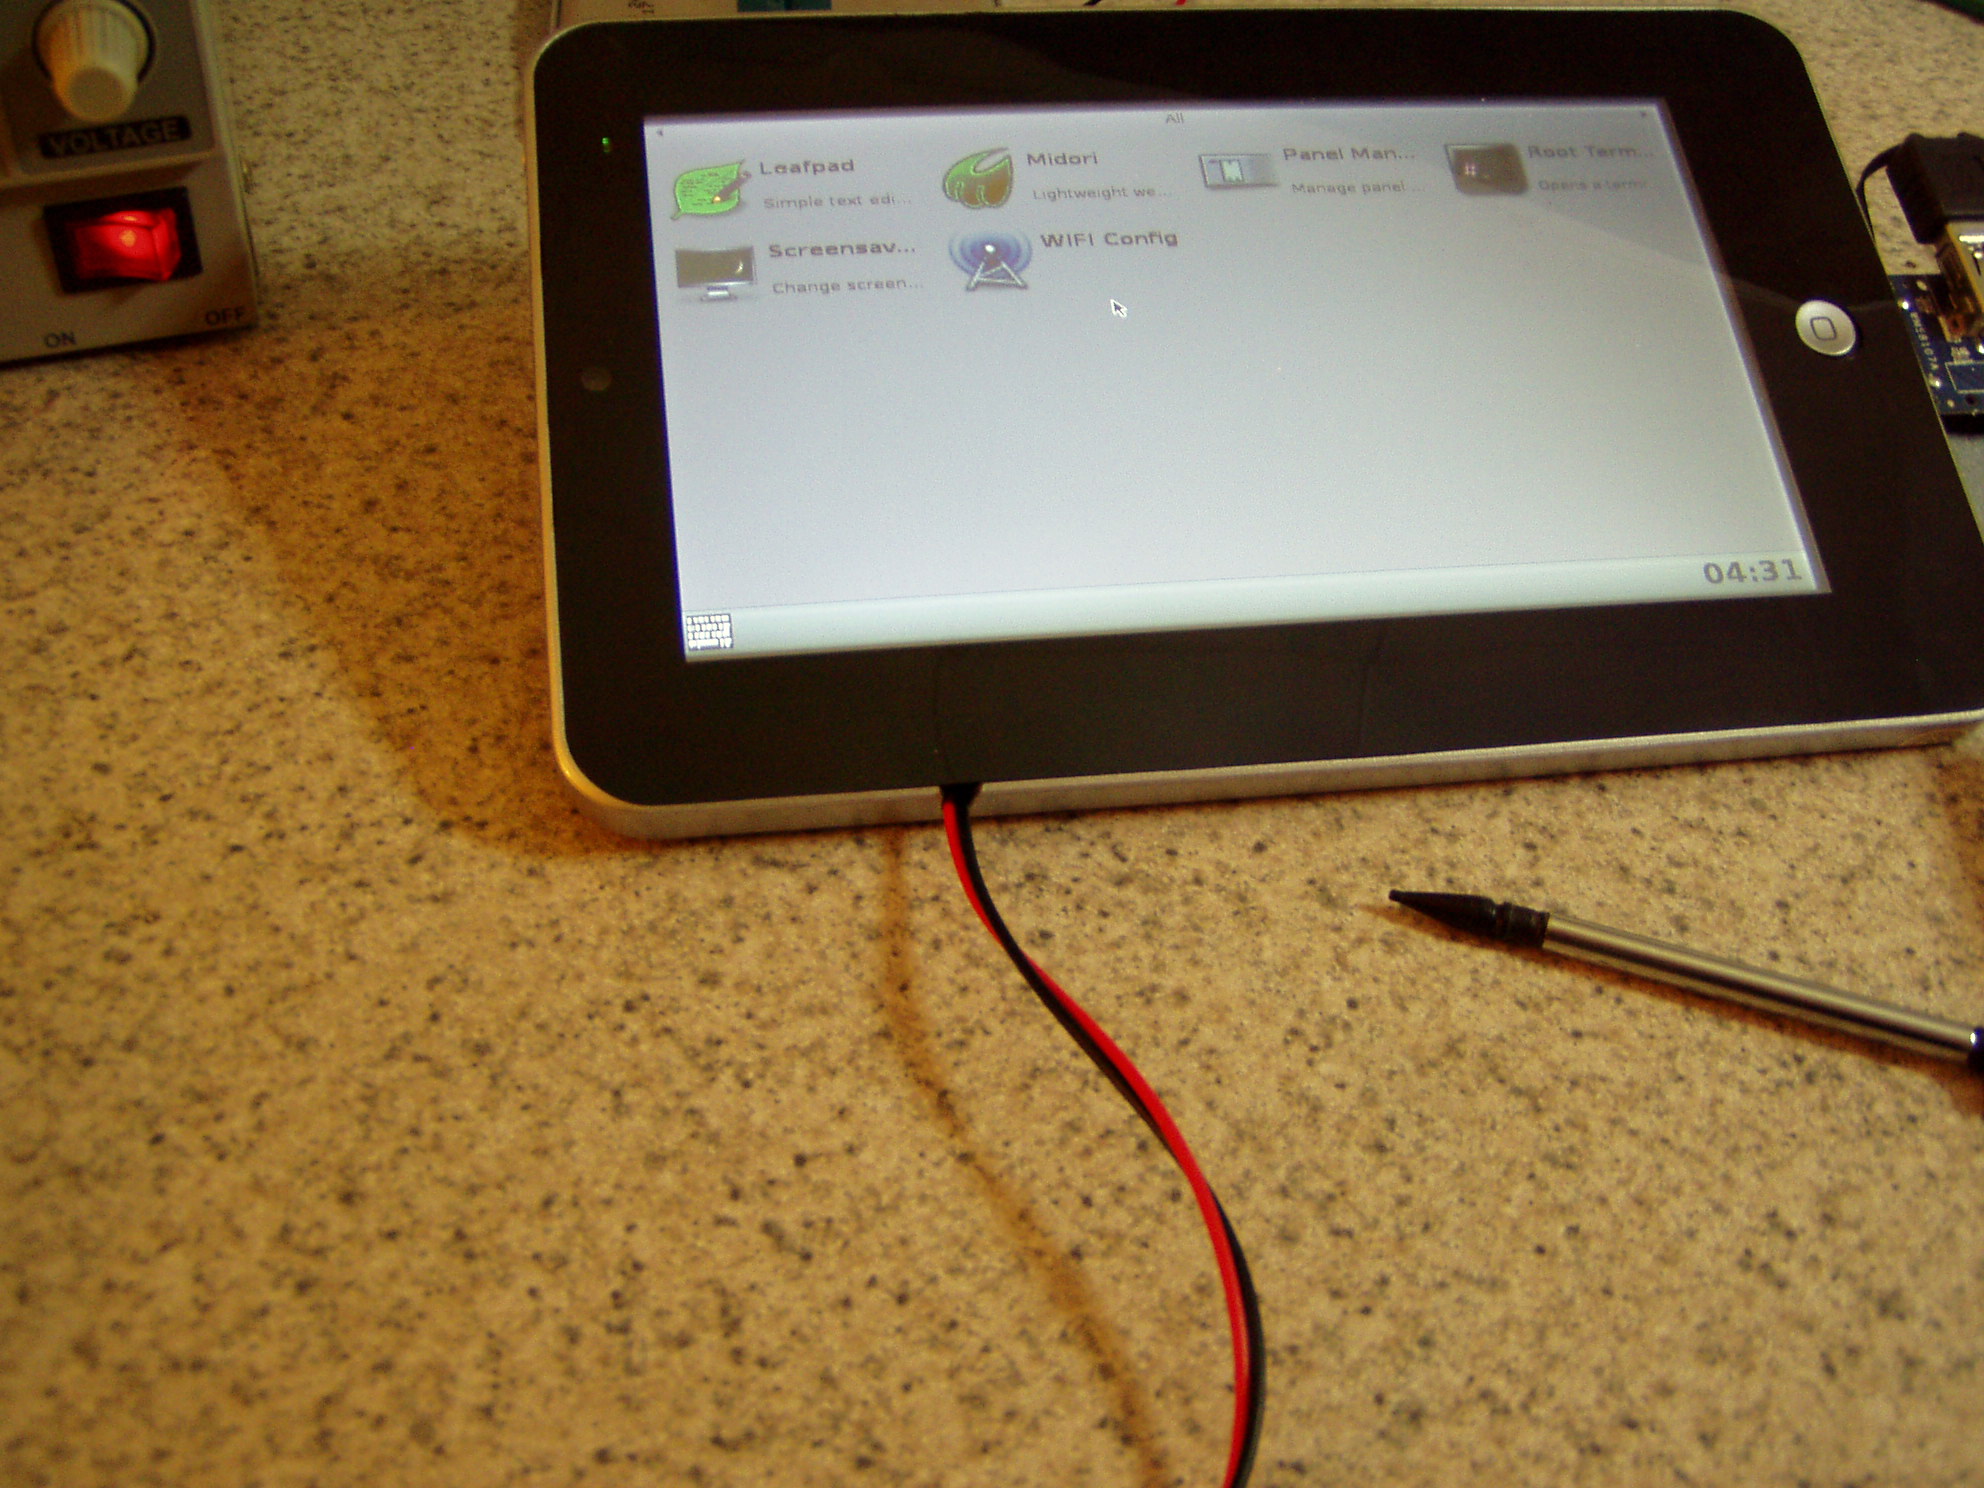
working.......
Attaching the power leads - with the connector and 12v power supply.
Charging the battery - which is a good battery.
Close-up of notch in case - notch to allow for power wires.
Test run after soldering wires - see battery with small pc board.
All back together again - running linux with mouse and ethernet.